Welcome to the AI Tree Diagram Maker! #
This guide will walk you through the basic steps to create your first diagram. Our tool is designed to be intuitive, whether you prefer typing, using AI, or interacting visually.
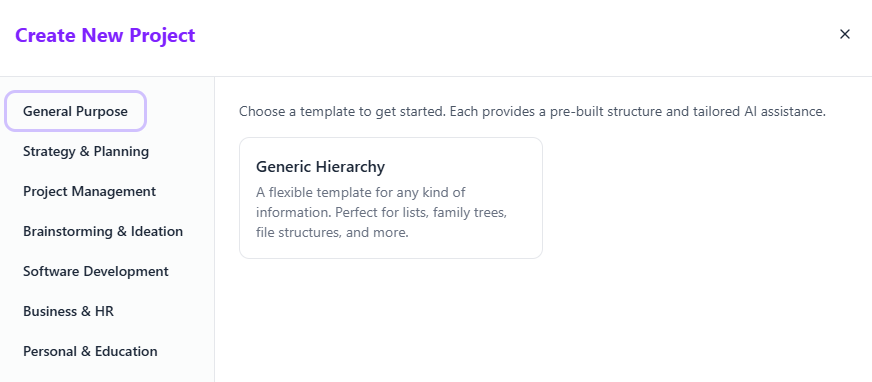
1. Creating a New Project #
To begin, click the “File” menu in the top-left corner and select “New…”. This will open the Blueprint library. A “Blueprint” is a specialized template designed for a specific task, complete with tailored properties and AI capabilities.
For your first project, we recommend the “Generic Hierarchy” blueprint under the “General Purpose” category. It’s the most flexible option and great for learning the ropes.
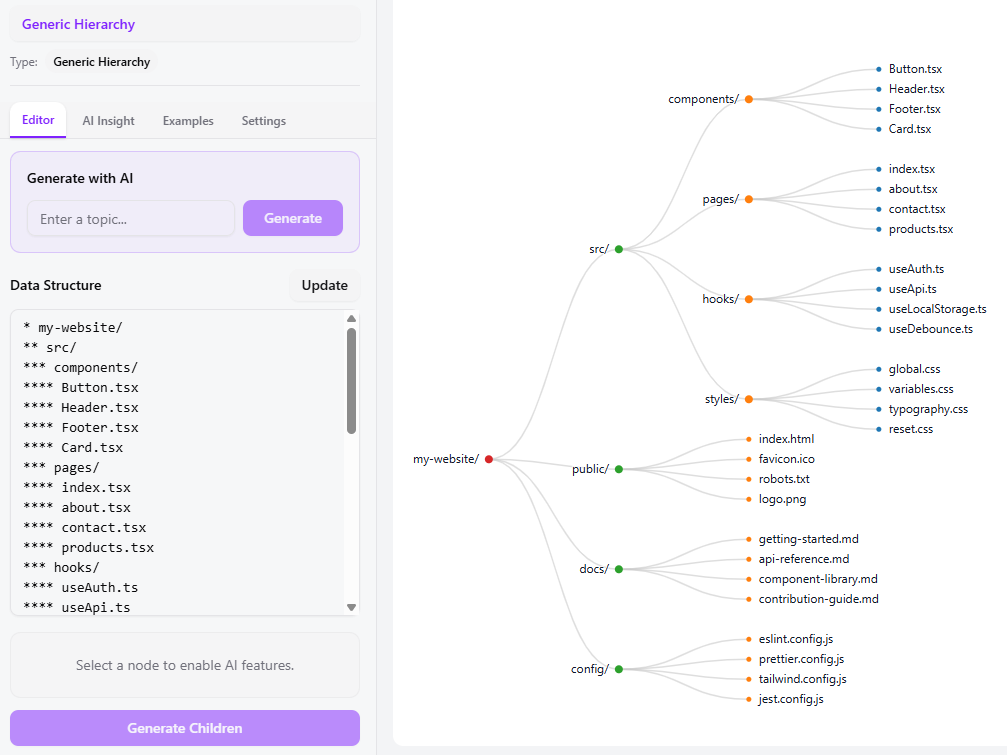
2. Understanding the Interface #
Your screen is divided into two main sections:
- The Left Panel (Control Center): This is where you’ll do most of your work. It contains tabs for the Text Editor, AI Insight, Examples for inspiration, and visualization Settings.
- The Right Panel (Canvas): This is where your interactive tree diagram is visualized. You can click, pan (drag the background), and zoom (mouse wheel) to explore your creation.
3. Three Ways to Build Your Diagram #
You can use any of these methods at any time, and they all sync with each other. Let’s try creating a simple “To-Do List”.
Method 1: The Text Editor (For Speed) #
In the “Editor” tab, type your items using asterisks (*) to denote levels. One asterisk for the root, two for a child, etc.
After typing, click the “Update” button to see your changes reflected on the canvas.
* My Weekend To-Do List
** Chores
*** Clean the kitchen
*** Do laundry
** Fun
*** Read a book
*** Go for a hike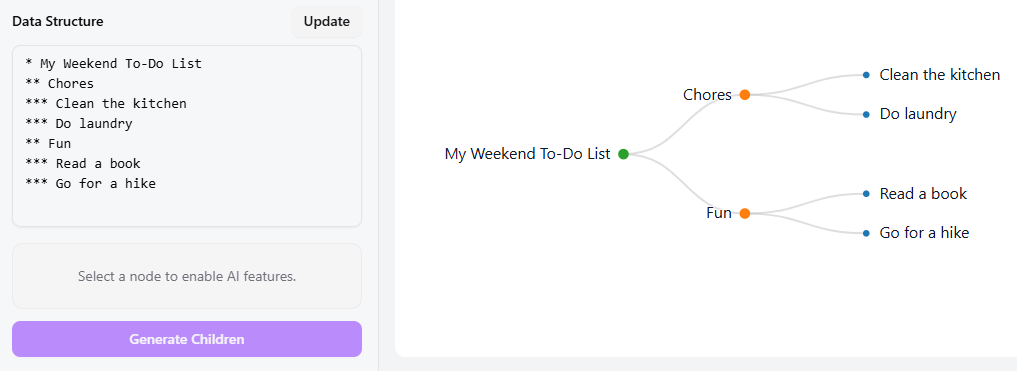
Method 2: Full AI Generation (For Ideas) #
Let’s start fresh. In the “Generate with AI” box, type a topic like “Plan a birthday party” and click “Generate”. The AI will instantly create a detailed diagram with common party-planning tasks.
Method 3: AI Child Generation (For Expansion) #
Once you have a diagram, you can expand any part of it. Click on a node’s text label (e.g., “Send Invitations”) to select it. Then, click the “Generate Children” button at the bottom of the left panel. The AI will add relevant sub-tasks like “Design invitation,” “Gather guest list,” and “Mail invitations.”
4. What’s Next? #
Congratulations! You’ve learned the fundamentals. You can now edit the details of any node using the Property Editor, get high-level analysis with AI Insight, or save and share your work.